
They say you have to break a few eggs to make an omelet, and if you tuned in for Part 1 of our Diesel Mini Bike Build, you saw us hack a vintage mini bike in two, take a file to a spinning crankshaft and run up a wicked cart on Amazon.com. All in a day’s work around here, but even with just a few big pieces coming together, this project was shaping up to be more than just a ridiculous idea.
That being said, all we really had was a roller with a dirt-cheap diesel engine from Amazon shoehorned into it, and it would take some real work to make the thing rideable. With our collective investment in the project growing, we got serious and cooked up some trick hardware that I think you’re going to dig, so let’s get to it.
Don’t Call it a Gas Tank Housing the fossil sauce to keep you in motion, and adorned with cherished trademarks, stripes and scallops, a motorcycle’s fuel tank is a defining piece of its character. If you’re building a custom bike, it’s one of those things you really can’t afford to screw up, and somehow, the stakes are bigger on a mini bike.
You’d assume any old fuel tank would fit the bill, maybe something from your personal stash, but I’ll tell you there’s no fitting an OE fuel tank to this mini bike frame without a ton of fabrication. It’s the triangular backbone of the bike that causes all the problems, but we took that as an opportunity to kick things up a notch.
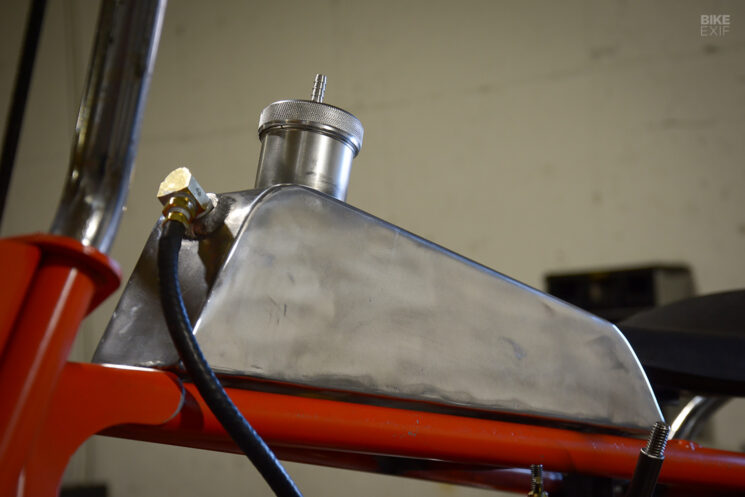
The design started with some simple CAD (Cardboard-Aided Design) before we dared to slice up our last decent piece of 14-gauge 4340 aluminum. The first piece of the puzzle is the pan, with a pair of mounting tabs on the bottom to secure it to the frame. The pan is sized a little wider than it needs to be, which gives us an inside corner to weld instead of an outside corner. While it’s all personal preference, the inside corner approach gives you more meat to work with when you’re welding and grinding the corners smooth.
The shape we went with is fairly basic, but we knew it would all come together in the finishing details. Most of the tank is made from a single piece, meaning we could use the brake to define the top and sides instead of welding them. From there, the front and back were capped with pieces bent over a knee.
At that point, you have a really nice sheet metal box, but it takes a few more pieces to feed your organized leak. The filler is a 2-inch aluminum deal, a bargain on Amazon at just $13.08, and a pair of 1/2-inch weld-in bungs handle the feed and return.
It’s all pretty straightforward, but remember this trick next time you’re welding in a filler neck. Measure where you want the neck to meet the tank and place several tack welds at that depth. That way, the filler neck will drop into the tank and stop at your designated depth, leaving you with two free hands to weld and a perfectly perpendicular fuel filler.
Double-Sprung Saddle Our mini bike needed a seat, but much like the challenges we faced with the fuel tank, the shape of the frame did not lend itself to the kind of junk you’d have lying around. While I’d love to tell you that we bent up a pan, shaved the foam and busted out our sewing kit for custom upholstery, it just didn’t fit the budget or time frame you’d devote to a plaything.
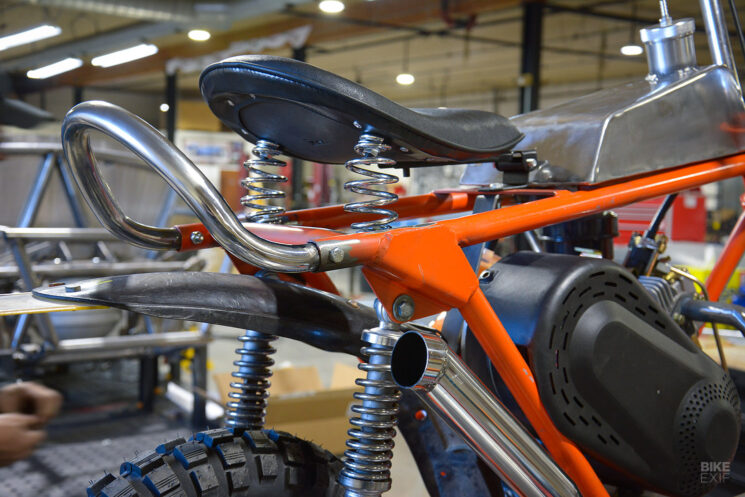
In the end, we opted for a basic sprung solo-seat because it was cheap ($30 on Amazon) and installation couldn’t be easier. And yeah, save the chime-ins, as our sales associate Tom G. already grilled us for putting a sprung saddle on a swingarm bike—hardtail guys will be hardtail guys.
With the seat and rear fender mounted, the back of the bike was starting to take shape, but it still needed a little something. Mini bikes need a grab bar, and we had some 1-inch stainless tubing on hand, salvaged from the railing of a 14-foot Boston Whaler. While we had to fudge the bends slightly, I couldn’t be happier with the looks and utility of the grab bar. It sorta has an old-school Cushman vibe, and I can dig that.
One Step Forward, Two Steps Back At this point, I need to jump ahead several steps to address the first major hiccup we encountered, interrupting our otherwise blissful hackery. We had completed the initial assembly of our diesel mini bike, and pushed it outside to bask in the glory and take a few test laps around the parking lot.
With the afternoon sun glimmering on all the polished metal surfaces, we looked at all we had created, and it was good, but would it work? Would it be fast? The only way to know was to activate the decompression lever and pull our Amazonian oil burner to life, and it belched a righteous cloud of smoke into the air.
I threw a leg over the saddle, ready to relive every mini-bike experience of my life, but better, and grabbed a handful of throttle. The diesel clattered up to operating RPM, the drive clutch started spinning and the bike began to move—backwards.
Yup, turns out it was all wrong, and we’d failed to take note of the CVT’s rotation when we tested it on the bench. Everything just seemed to fit so naturally in the frame that we were oblivious, and the following crowd-sourcing session of possible fixes was decidedly uninspired.

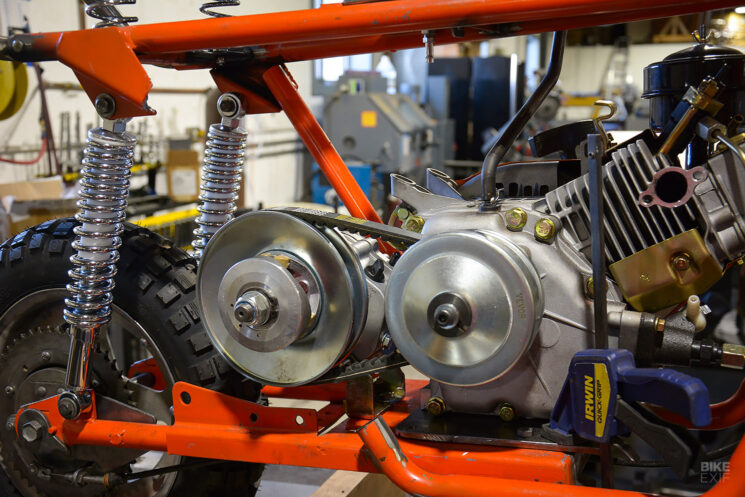
Flip-flopping the engine wasn’t an option. It didn’t fit well, and worse yet, it looked dumb, so we needed a creative workaround to reverse the rotation from the driven clutch. With morale low and enthusiasm from management dwindling, we gambled the last cent of our mini bike budget on a go-kart reverse gearbox from maXspeedingrods. They’ve become a household name for making the cheapest turbochargers money can buy, so you know we’re in good hands.
Our Vevor driven clutch would mount directly to the gearbox, and the box would be mounted in the bike with supplied bracketry. A 10-tooth sprocket comes off the gearbox, so we’d shift the box into reverse and throw the shifter in the trash—problem solved. Except it didn’t exactly fit.
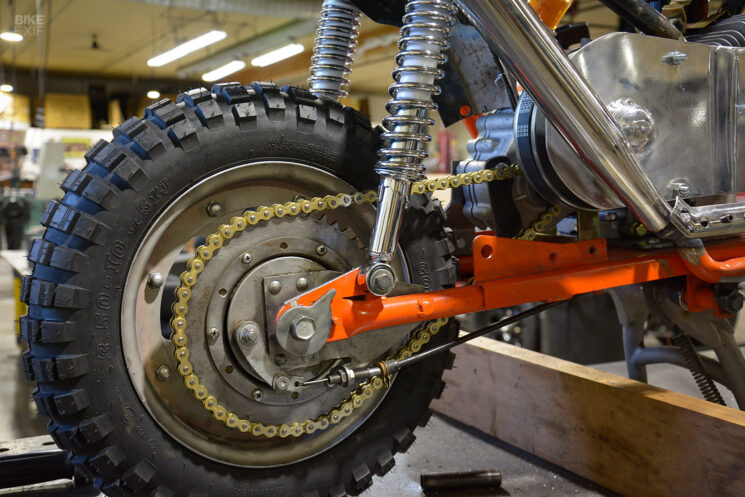
The driven clutch interfered with the frame, and there wasn’t really a good way to move it. So we moved the frame. We axed the rear leg off with an angle grinder and shaped a new one out of some 1-inch tubing. Yeah, it’s 1/8-inch off from the tubing used on the rest of the frame, but you’ll never see it, and everything fell right back into place.
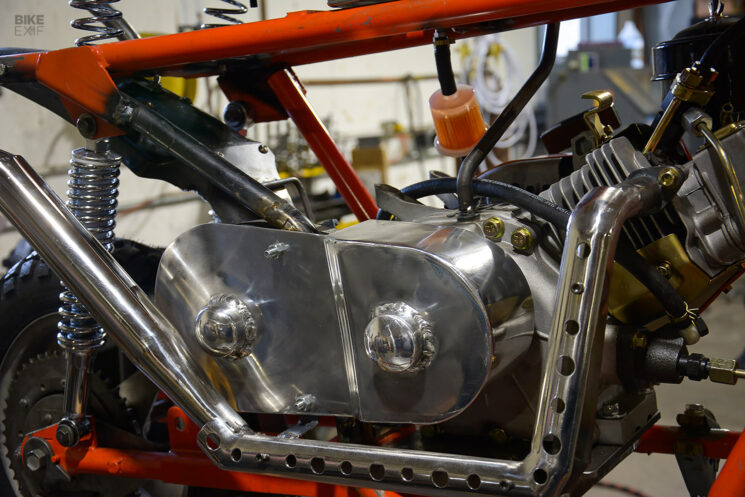
Scatter Shield I don’t foresee us running the diesel mini bike hard, but if you’ve never witnessed a belt failure on CVT, take my word that it can be quite violent. So, in the spirit of not getting peppered in the nether regions with belt parts, a custom clutch guard was in order.
The guard is made from the same bits of 14-gauge 4340, and we did all of our welding with 5356 rod. It’s nowhere near as complicated a project as the fuel tank, and you could build the same thing at home with basic tools.
The most entertaining parts of this guard are the two domed pieces that cover the clutch bolts. We scrounged some waste material from a bench press in the shop (a machine that can be used to press holes, louvers, etc.) and brought it over to the hydraulic press. We placed the scrap pieces in the press between a chunk of tubing and a 2-5/16-inch hitch ball to get the convex shape we were after.
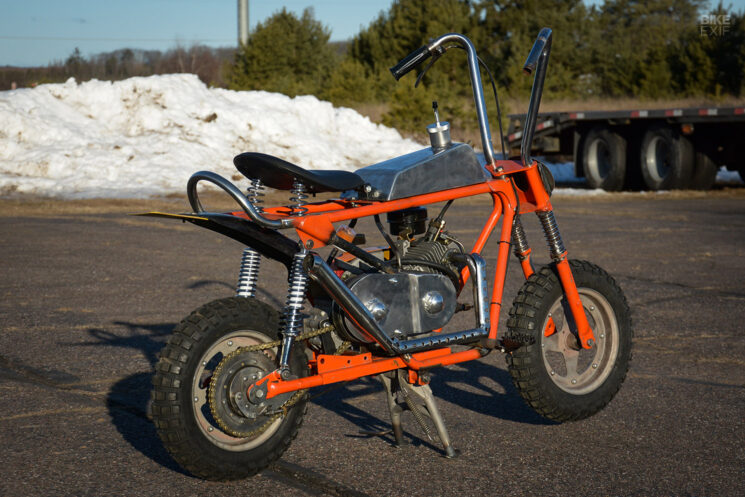
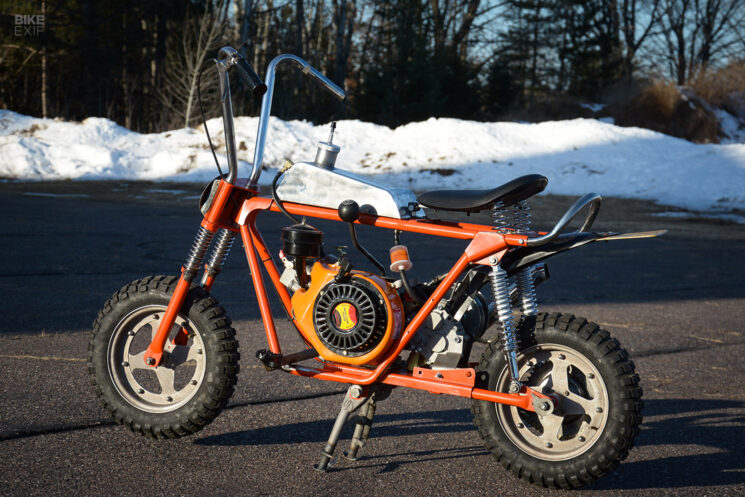
Inching Toward the Tiny Reveal I don’t know how it looks from where you’re sitting, but for me, I cannot look at this machine without losing my sh*t. If you haven’t spent much time around old-school mini bikes, I’m telling you, go scoop up some garbage on Marketplace and put it together. The parts are dirt-cheap, and there’s zero reason to chase perfection. Also, everything motorcycle-related just becomes infinitely cooler when it’s tiny. A crude exhaust, a backwards dirt-bike fender or even a sprung seat over rear shocks, the rules just don’t apply here.
From here, we’re ready to tear everything back down and splash some color on this hog, so be sure to tune in next week for the big reveal.
This article contains affiliate links, which means Bike EXIF may receive a commission if you click a link and purchase something we referenced.